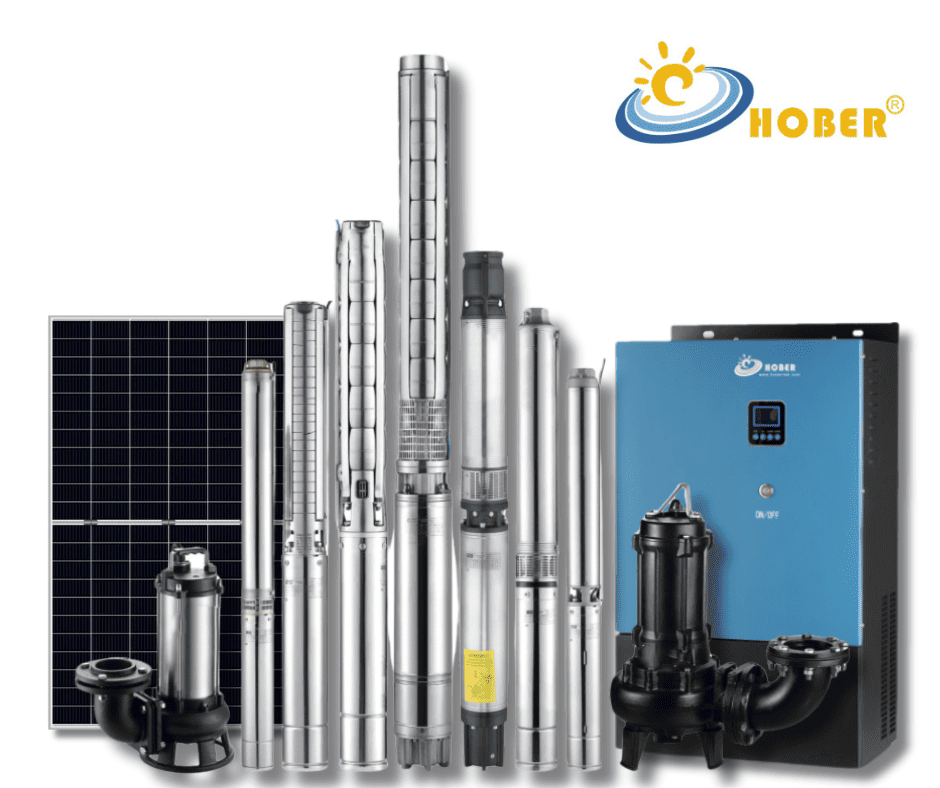
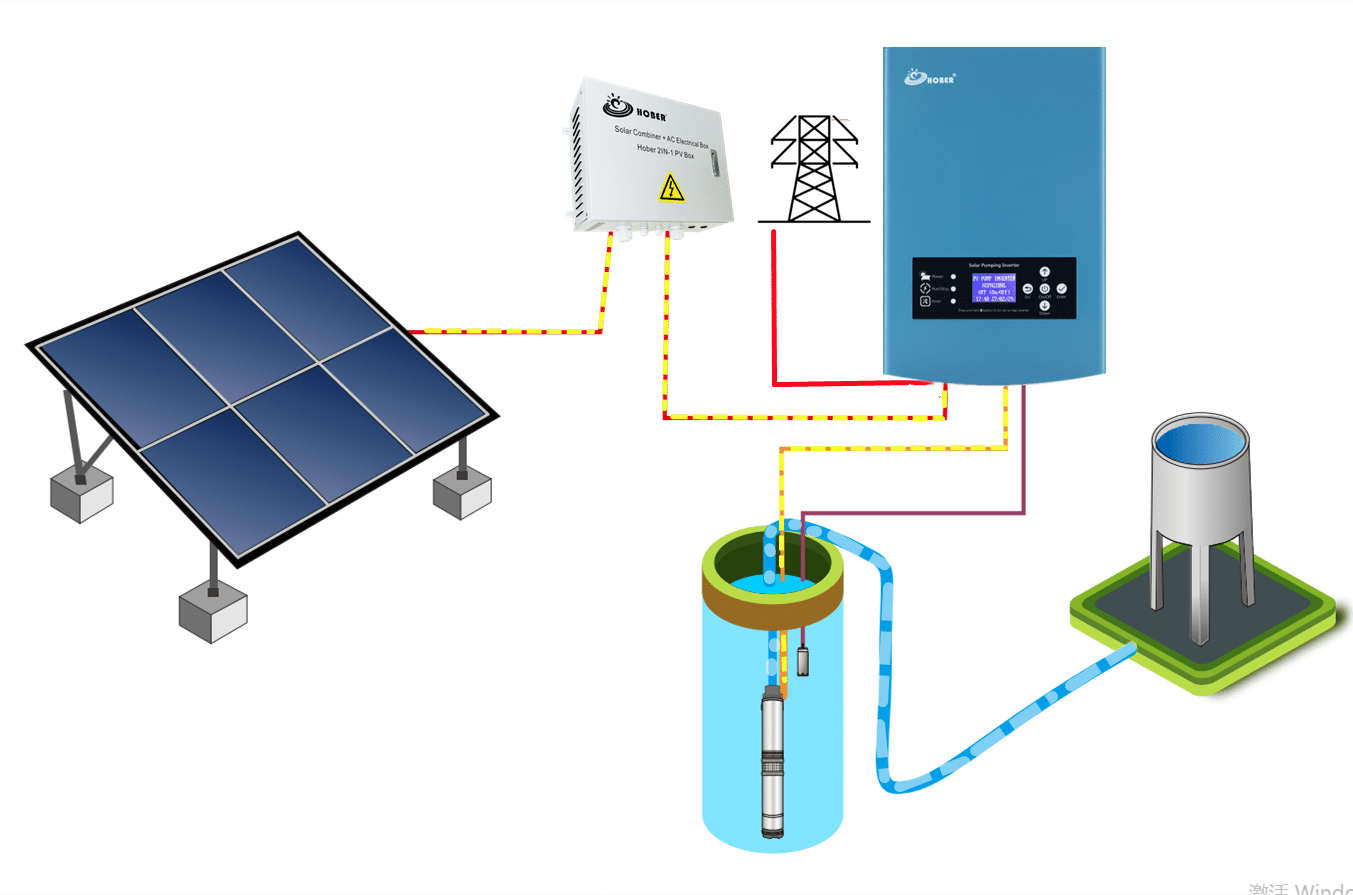
I struggled with my first solar submersible pump setup last summer. The well dried up unexpectedly, and improper installation caused failures. Don’t let that happen to you.
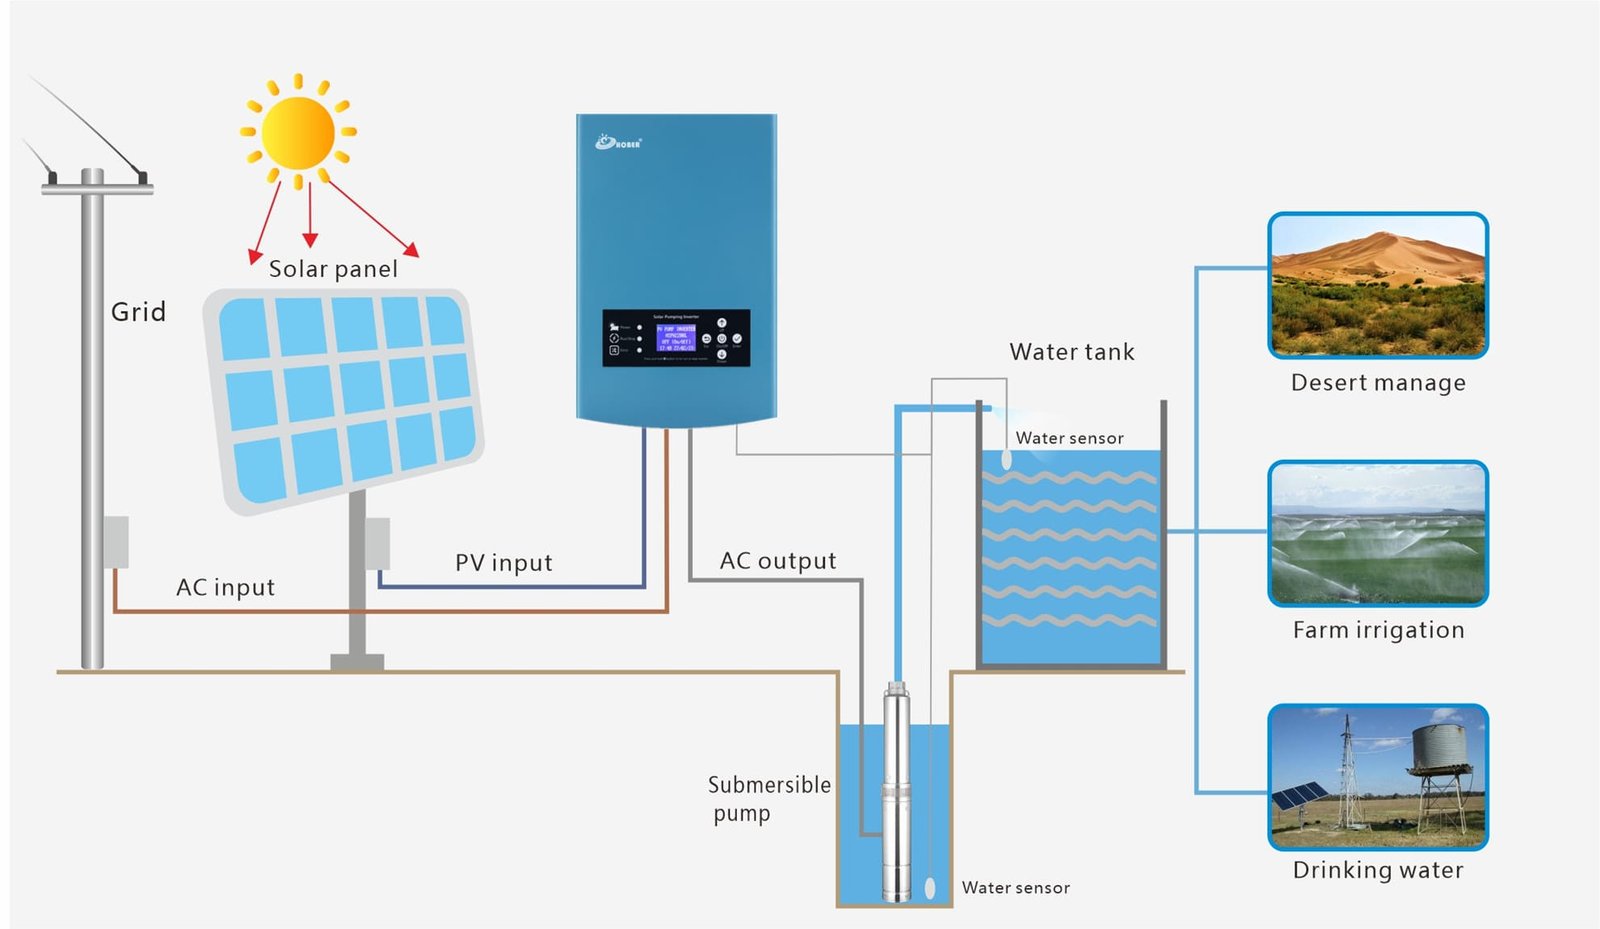
Solar submersible pumps need careful setup from well prep to wiring. Key requirements include well diameter larger than the pump, clean water with pH 6.8-8.5, pump positioning 1m below dynamic water level, secure piping, proper cabling, sensors, and pre-start checks.
I know it sounds complex, but breaking it down step by step makes it manageable. Let’s dive into each part to ensure your system runs smoothly with solar power.
Well Preparation and Water Quality: What Do You Need?
I once skipped cleaning my well, and sand clogged the pump within days. It cost me time and money to fix. Avoid my mistake.
Prepare your well by ensuring the diameter fits the pump. Clean out debris, remove sand from new or unused wells, and check water quality: solids under 0.020%, pH between 6.8 and 8.5.

I learned the hard way that poor well prep leads to breakdowns. To go deeper, consider these aspects.
Well Diameter and Cleaning Steps
Check your well’s diameter first. It must be bigger than the pump’s widest part. I measure mine twice to be sure.
Clean the well bottom before install. For new wells, pump out muddy water until clear. Old wells need the same if unused long.
Handling Sand and Mud
Sand ruins pumps fast. Flush the well with clean water. Use a temporary pump if needed. In my backyard well, I spent a day flushing, but it saved the solar system later.
Water Quality Checks
Test for solids. Keep under 0.020% by weight. I use a simple kit for pH, aiming 6.8 to 8.5. Acidic water corrodes parts, alkaline harms seals.
| Aspect | Requirement | Why It Matters |
|---|---|---|
| Well Diameter | Larger than pump max size | Prevents stuck pump |
| Bottom Cleaning | Remove all debris | Avoids clogs |
| Sand Removal | Flush until clear | Protects impeller |
| Solids Content | <0.020% | Reduces wear |
| pH Level | 6.8-8.5 | Prevents corrosion |
These steps ensure longevity. I added a filter after testing, cutting maintenance in half. Think critically: ignore quality, and solar efficiency drops from frequent fixes.
Pump Positioning and Fixing in the Well: What Matters?
My pump once sat too low, sucking up sediment and failing. It disrupted my garden watering. Learn from that.
Position the pump at least 1m below dynamic water level, 5m above well bottom. Use steel wire and clamps to lower it, fix with a bracket at the wellhead.

Proper fixing prevents movement and damage. Now, let’s explore the details to make your install solid.
Minimum Submersion Depth
Keep the pump 1m below the lowest water level. This avoids air intake. In dry seasons, I monitor levels closely.
Distance from Well Bottom
Stay 5m above bottom to dodge sediment. My error here caused overheat once. Adjust based on well depth.
Lifting and Securing Methods
Use steel rope and clamps for lowering. Nylon rope works too, length matches well depth. Fix at top with a sturdy bracket.
I rigged mine with extra clamps for safety. During a storm, it held firm.
Tools and Safety
| Tool | Use | Tip |
|---|---|---|
| Steel Wire Rope | Lifting | Check for frays |
| Clamps | Securing | Tighten evenly |
| Bracket | Wellhead Fix | Bolt securely |
| Rope Length | Depth Match | Add extra for ties |
Critically, wrong positioning cuts pump life. I tested depths in a barrel first, simulating conditions. This approach saves solar setups from common pitfalls.
Pipe Connections: What Are the Rules?
Pipes burst on me once from poor choice, wasting water and time. Solar systems need reliable flow.
Choose PVC for 80-100m head, steel for over 100m with rust proofing. Bury pipes underground. Connect with matching sizes, add valves and check valves.
These choices affect pressure and durability. Dig deeper into materials and methods.
Pipe Material Selection
For heads 80-100m, PVC works well. Over 100m, use steel inside well, treated against rust. PPR beats PVC for pressure over 2.0MPa.
I switched to PPR after a leak, better heat resistance.
Burial and Protection
Bury all pipes to shield from sun. UV ages plastic fast. In my install, burying extended life by years.
Connection Techniques
Match pipe to pump outlet. Use clamps to secure. Add elbows, valves, pressure valves, flow meters as needed.
For ground pumps, add check valve on suction to stop backflow.
PPR Specifics
Heat PPR with a tool before join. Watch for burns. I glove up always.
| Component | Requirement | Benefit |
|---|---|---|
| PVC Pipe | 80-100m head | Cost-effective |
| Steel Pipe | >100m head | Stronger |
| PPR Pipe | >2.0MPa | Durable |
| Check Valve | Suction line | Prevents drain |
| Burial Depth | Underground | UV protection |
Think about flow: wrong pipes drop solar efficiency. I mapped my system on paper first, avoiding mismatches.
Electrical Wiring and Cable Management: How to Do It Right?
Wiring shocked me literally once from loose connections. Solar relies on clean power transfer.
Assemble pump and motor, ensure free rotation. Keep cables under 100m, add reactors for longer. Wire three-phase U-V-W directly, single-phase per manual, remove capacitors.
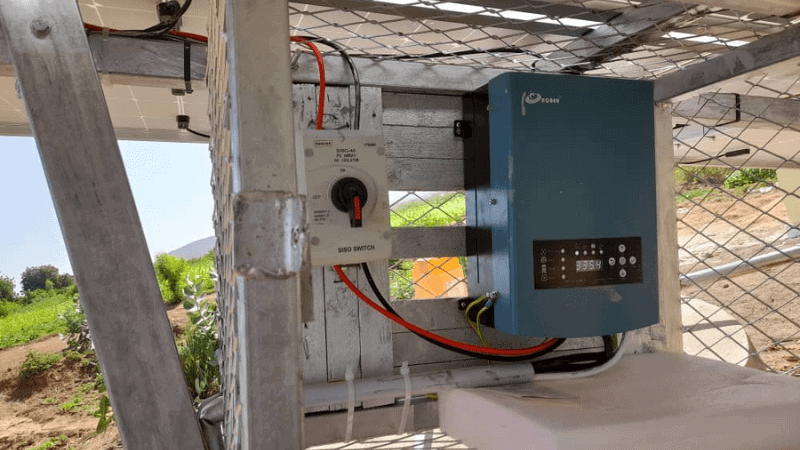
Good management avoids drops and faults. Let’s break it down further.
Pump and Motor Assembly
Join them, test rotation. No jams allowed. I spin mine by hand pre-install.
Cable Length Guidelines
Under 100m fine. Over, add reactor: output for ≤250m, dv/dt for ≤400m, sine for ≤1000m. Thicken cables too.
My 150m run needed a reactor to stabilize voltage.
Wiring for Phases
Three-phase: U to U, etc. Single: Common to U (red), run to V (yellow), start to W (blue). Remove external caps.
Cable Types and Insulation
Use thick-coated submersible cables. Strip 40mm, twist 20mm, wrap with tape, heat shrink for waterproof.
Keep clean. For single wires: insulate then waterproof. For three: waterproof first.
Measurements and Prohibitions
Resistances: infinite to ground, equal phases for three, R1=R2+R3 for single.
Never lift by cable. Ground last.
| Cable Length | Add-On | Purpose |
|---|---|---|
| ≤100m | None | Simple |
| ≤250m | Output Reactor | Voltage stability |
| ≤400m | dv/dt Filter | Reduce spikes |
| ≤1000m | Sine Filter | Smooth wave |
Critically, poor wiring wastes solar input. I measured everything twice, preventing shorts in my off-grid setup.
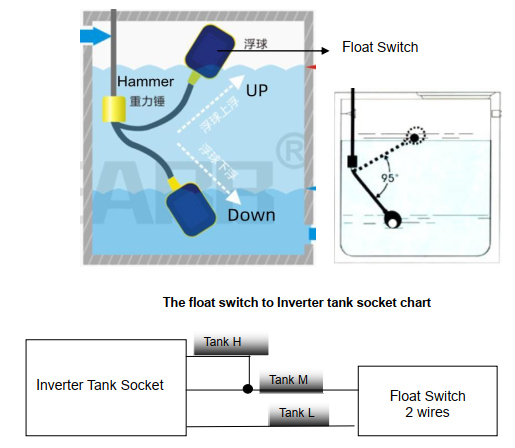
Water Level Sensor Installation: What Are the Key Points?
Sensors failed on me during low water, burning the pump. Solar systems need reliable detection.
For well: distinguish high, mid, low levels. Use 3-core wire, shielded over 100m. Install float 5m above intake, not on pipe.
For tank: Parallel short and medium to high, long to low on Hober inverter.
Sensors protect from dry runs. Explore the setup in detail.
Well Sensor Wiring
Use 0.3mm² flat 3-core. Shield for long runs. Connect per levels.
I zip-tied mine carefully, avoiding binds.
Positioning Tips
Float 5m above pump inlet. Free movement key. Binding on pipe jams it, fools inverter.
Tank Sensor for Hober
Short and medium parallel to high float. Long to low.
Test in a bucket first, like I did.
Cable Choices
| Type | When | Why |
|---|---|---|
| 3-Core Flat | <100m | Easy |
| Shielded 3-Core | >100m | Noise-free |
Think: without sensors, solar pumps overwork. My story: added one after a dry run, now auto-stops safely.
Pre-Start Checks: What Should You Verify?
I rushed startup once, no water, motor seized. Solar needs thorough checks.
No dry starts. Test in tank with solar. Check voltages in range. Tighten all wires. Pump rotates counterclockwise from top.
These prevent disasters. Let’s detail them.
Dry Run Prohibition
Never start without water. Cools and lubes. I always prime.
Pre-Install Testing
Run in tank on solar. Watch for issues. My test caught a loose wire early.
Voltage Verification
DC input matches inverter range. AC too. Measure with multimeter.
Wiring Security
Tighten screws, check terminals. Tug wires gently.
Rotation Direction
Counterclockwise from above. Wrong way reduces flow.
| Check | Method | Importance |
|---|---|---|
| No Dry Start | Ensure submerged | Protects motor |
| Tank Test | Run with solar | Spots faults |
| Voltage | Multimeter | Matches specs |
| Tighten Wires | Visual/feel | Prevents arcs |
| Rotation | Observe | Efficient pump |
Critically, skips here waste solar energy. I checklist everything now, ensuring smooth launches.
Conclusion
Proper solar submersible pump installation covers well prep, positioning, piping, wiring, sensors, and checks. Follow these, and your system thrives reliably.